New Youtube Channel

Now that my home's internet speed is upgraded, I can make more videos!
This is my new channel https://www.youtube.com/channel/UCgW4rIH3Gg6Lc8v4G0QlqgA
Please subscribe!

Wednesday, March 31, 2010

Steamed Tofu with Enoki and Beech Mushrooms


Lydia loves this dish. She ate 3 times when I cooked this. 1st when I fed her and Lyanne, 2nd when I ate, 3rd when Mike ate after he woke up from his evening nap. She hasn't been eating a lot lately and it's a great relief to see her having rice with this. Guess 2 year olds are like that, they start to choose... luckily she loves tofu.

It's pretty easy to do.

1 block of silken tofu, largely cubed
2 small packs of enoki, ends trimmed off and separated loosely.
1 pack of brown beech mushrooms, ends trimmed and separated

There's no rule to how much to put, just put as u please

2 shallots, sliced and fried til crisp in 3 Tbsp oil.
2 Tbsp light soy sauce
Some green onion slices

Method:
1. Arrange silke tofu cubes in a deep dish. Top with enoki and beech mushrooms. It'll be a huge mound, but don't worry, the mushrooms shrink a lot.
2. Steam on high heat for 7-10 minutes, until mushroom wilts.
3. Pour away liquid from dish.
4. Top with shallot and the oil it was fried in, and light soy sauce.
5. Garnish with some sliced green onions.


Monday, March 29, 2010

Blueberry Muffins with Lemon Sugar Crust


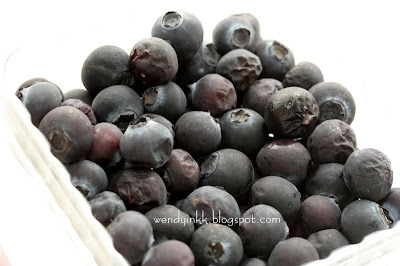
I made up the muffin recipe myself to accomodate the stuff in my pantry and the topping is from one site that I've forgotten to note down. I made these Nov 2009 when blueberries from Australia were in season.

The topping makes it different, with a tang. Blueberry muffins are everywhere with different versions on the internet, but not many comes with a tangy topping. Try this if u love lemons and blueberries.

My Mother in Law who is not a muffin lover find this to be good. She finds usual muffins to be dense and sticks to the palate and teeth. But no.. not this one. Muffins made with yogurt are soft and fluffy.

Recipe
250gm cake/superfine flour
1 tsp baking powder
1 tsp baking soda
200gm sugar
1 heaped tsp lemon zest
125gm blueberries

2 eggs
80gm melted butter
200ml plain yogurt

1. Preheat oven to 180/170C.
2. Sift cake flour with baking soda and baking powder.
3. Remove 2Tbsp of sugar and combine it with the lemon zest. Set aside.
4. Mix the balance of sugar with sifted flour. Set aside.
5. Lightly beat eggs and combine with melted butter and yogurt.
6. Make a well in the centre of (4) and pour in (5).
7. Mix just to wet ingredient. Do not combine until very smooth.
8. Put in blueberries and lighty mix. Do not break the berries.
9. Spoon batter into 12 4oz muffin cups. Top with some lemon sugar (3).
10. Bake for 25 minutes or until a toothpick inserted comes out clean.

I was greedy and baked them in 10 muffin cups and see what happened.. Don't repeat my mistake and bake them in 12.


I was trying to snap some pictures using natural light on my window sill and here's what happened....

The blueberries got stolen.... by Lydia.

Saturday, March 27, 2010

Marbled Pork


Just want to show you all how does the marbled pork that I mentioned in my Stir Fried Pork with Ginger Onion looks like.

It's not a prized cut from the Japanese Kurobuta Pig. This is just a cut from the everyday pig from the everyday market. But I'm sorry to say that not all butchers know of this cut. This was introduced to my mom by her butcher, and she can't find this at other butchers.

Why is this cut so nice... it almost melts in the mouth, needs not much chewing. The marbling makes it really tender. Very good when sliced and steamed with your favourite marinade and splendid when used in quick stir fries. When my mom used this to make a quick soup with chinese long cabbage, it turned pink, I mean, pink, pastelly pretty pink.

Thursday, March 25, 2010

Toddy Mee Ku 椰花酒面龟


Mee Ku, 面龟 is a Hokkien word for Tortoise Bun. It is basically a mantou, or plain steamed bun. This recipe is given by my mother’s neighbor cum church friend. I first tasted these when this neighbor, Mr Teh made them for a church fund raising programme. It was so delicious, and my mom said, it was the first thing sold out during the fund raising sale.


These buns were made using toddy. Toddy, 椰花酒 is liquor made from coconut flower sap. The sap is collected via chopped off coconut flower stems. The sap ferments with natural yeast and don’t think that this is mild…. It can make u drunk!!! Toddy taste sweet, but I don’t like to drink it. Some people nickname this as barley drink, just as beer is chrysanthemum tea. :)

Original recipe calls for margarine, but I’m using butter. Mr Teh didn’t give me a precise amount for toddy, but all that I know is, knead it with pure toddy, no water. And this toddy amount is from my experiment.


450gm all purpose flour
90gm sugar
350gm toddy (It’s not 350ml, alcohol is lighter than water, better weigh it, as there might be air bubbles in it, thus making volume measurement inaccurate)
65gm margarine/butter

Mix everything together and knead until dough is soft and smooth. Shape into 10 peanut shaped buns and leave to proof* until double in size. Steam on high heat for 20 minutes.


*Warning::: Proofing time was 8 hours!!!!! I shaped them before I slept, steamed them when I woke up. The oven is a safe place to multilayer proof buns. I tried using hot water in the oven to make a warm environment for proofing, but it killed the natural yeasts!!!! So better be patient and wait. This white fluffy buns are from my 2nd attempt.

You can speed up the proofing by sunning them, cover with a cheesecloth and lay them out under the hot sun. I was told with sunning them, the proofing is 2-4 hours. But I was also told, since toddy is a homemade liquor, the amount of natural yeast in them differs, therefore, nothing is 100% accurate. U have to watch out for your own.

The buns expand further when steamed, just like buns that has double acting baking powder added in. So, don't be fooled by them looking small. Steam them when they look doubled, and when they are steamed, they'll be triple of the "before proofing" size. Give them space to expand in your steamer
You can buy toddy and keep it in the fridge until time to use. Shake the bottle before pouring out as the yeasts tend to settle at the bottom. If u cannot find toddy, but can find "air nira nipah", u can use that too. Air Nira Nipah is the flower sap from another palm and it also ferments the same way as toddy. Once I bought that from a road side stall on the way from Kelantan to Terengganu. I thought that it is a sweet drink, one sip and I puked it all out. It tasted like toddy, alcoholic. U can know that it's really fermenting when u open up the bottle, bubbles rush up and sometimes, out.

Updated few hours later : From the comments, I got to know that "toddy" seems inaccessible to many, I will experiment with fresh coconut juice and wine yeast to make this again. Let's see whether I can get the same fine texture and smell with coconut juice. Regular baking yeast can't this result.

Updated 26/3/10 :


Read these to see where to get your toddy
Brickfields  behind Palm Court condominium
Klang-Teluk Gong  Coconut Flower Seafood Restaurant 03-31341167.
Butterworth Ong Cheng Huat Seafood 04 3314782
Georgetown Stewart Lane
Johor Bahru, Somewhere on the way from JB to Sungai Tiram, and lots in Kluang
Ipoh, somewhere, behind Hume St. or try Buntong area :)
Where ever Gula Melaka is produced, u can get toddy there. Just get the raw sap, that will be toddy in a few hours time.

Where to get Air Nira Nipah (Usually sold by Malay vendors. If it's bubbly the time u open the bottle, it's fermenting and good for meeku, but if it's chilled and there seems to be no activity, leave it at room temperature in a mineral bottle/ coke PET bottle for a few hours. The bottle will get hard with the pressure building from within from the fermentation process and when u open up the cap, whoooozzzz.... bubbles and gases will erupt!!)
Coastal trunks roadsides
       -Kelantan to Terengganu
      -Teluk Intan to Sitiawan
     -Kuala Selangor coastal road all along Sekinchan upwards


Taiping

Readers, if you happen to know where else, do notify me. Thanks.

Tuesday, March 23, 2010

2 cakes and some rumblings......


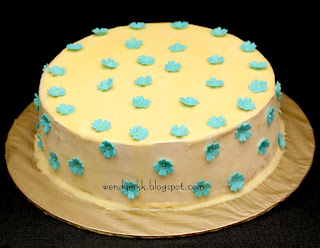
 I made this cake for my mother's 63rd birthday earlier this year in January. It took me so long to post this up cos I was waiting for the cut up pic from my brother.

This is a white chocolate macadamia cake. It's quite a horror doing this. I made the white chocolate ganache just the way I do my dark chocolate ones and it just wasn't right. Later I found out that, I actually should use less cream when it comes to white chocolate. I had a bad time trying to coat the cake with it. My dining table flooded with the ganache. I tried chilling in the fridge for few hours, but still it's very liquidy. Sigh, should've just made a cream rim and poured the liquidy ganache in the center. After pouring onto the cold cake and letting it set overnight, the texture felt like sweetened condensed milk.. sigh... lesson learnt, use 1 part cream 3 parts white chocolate, and not 1 to 1.
The cream I used this time is a compound cream, dairy cream stabilised with some non dairy compounds. The brand is Milac. Flavour wise, ok. But not as good as real dairy cream but better than non dairy. I mixed some of the ganache into the cream to give it some white chocolate flavour. I also slightly overbaked my macadamias, making them, brown. But with all these headaches, the cake is still nice to eat.

One thing that I'm really happy with this cake is, the sugar paste flowers. They stayed on very well, not bleeding at all onto the white chocolate ganache. Last time, during Lydia's 1st birthday party, the sugar hearts on her cake bled and stained her cake the next day.

And this is one cake that my cousin requested me to do for her mother in law's birthday, which was on Christmas. I was also waiting for the cut up pic to show u guys, but..... it didn't come by. This is a rainbow yogurt layer cake. Well, the feedback I got is that, the cake taste very yogurty, means sour. Well, as I said in the earlier cake post, I've mentioned that u need to be a yogurt lover to love this. Altho I adjusted the recipe with extra cream in the yogurt, plus more sugar, it's still too sour for her kids. Sigh, hard to please huh.

I haven't been doing any other cream cakes lately, except for one Japanese Strawberry Shortcake for an order. Well , the lady gave a free hand to do her a birthday cake, any cake, any price, as long as it's nice. So I chose the most popular cake. Sometimes people just love those emulsified cakes,cloud soft, melts in the mouth that needs no effort to chew. Cos the feedback was just an "OK", so I guess the cake is not as soft as bakery's. Because everybody who has ate this cake before raved about it, especially the filling. Headache..... I hate it when people gives me a free hand.

Monday, March 22, 2010

Curry Ikea Meatballs


I love Ikea's meatballs. Besides having them the Swedish way, I want to try making them with a curry sauce.

Few years back, Mike and I went to Pangkor Laut Resort for a weekend getaway. We had lunch at Chapman's Bar on the private Emerald beach, and I fell in love with their curry meatballs. It wasn't done with coconut milk, instead it was done with cream. It was splendid!!!


Here, I tried to recreate it. Although I do not know what spices they used, I tried using this "English" curry powder, supposedly imported from England and repacked here. Why supposedly, cos I'm not sure if it's really from there, I just read it from the packaging. Many aunties have recommended this curry powder, saying it's aromatic but not spicy.

Ok, so, to cook 16 pieces of Ikea meatballs (serves the 2 of us)

I used,
16 pieces of Ikea Swedish Meatballs
Butter for frying meatballs
1/2 cup onions, chopped
1 clove garlic, finely chopped
2 Tbsp Waugh's curry powder, or any other curry powder u may like
200ml cream (I used 31% fat content)
few tablespoons of water
salt and sugar to taste.

1. Thaw meatballs. Fry in butter until the outerlayer seems crisp. Dish out.
2. With remaining butter in pan, saute onions and garlic until onions turn soft.
3. Put in curry powder and fry until fragrant.
4. Put in cream and let it simmer until it turns thick and creamy. Add some water if it's too thick. Season sauce with salt and sugar.
5. Return meatballs to the sauce and coat them evenly.
6. Dish up meatballs and serve with rice/pasta or whatever u prefer.


Few days later I cooked the meatballs with a sweet and sour sauce.
Swedish meatballs in a Chinese sauce :)
Great fusion and easy to do.

Friday, March 19, 2010

Mixed Fruits Chocolate Pavlova


After my successful Pavlova tryout, I'm game for a second pavlova, for my Form 6 buddies on Day 4, Chinese New Year. Well if u remembered, 2 days back I posted a post for the main course, fried rice with dried scallops and kailan stems. This is the dessert. And also to use up more egg whites :)

Since I had to serve about 10 dessert hungry wolves, I decided to go ahead with Nigella's recipe with 6 eggs.

What I used,
For the Pavlova
180gm egg whites (6 egg whites from 6 large eggs)
300gm sugar (don't cut on this, if not the pavlova won't hold)
3 Tbsp cocoa powder, sifted
1 Tbsp corn starch
1 tsp rice vinegar
50gm dark chocolate, chopped


What I did,


1. Preheat oven at 180C. Draw a 9 inch circle on a non stick baking paper. Put drawn side down on a large tray.
2. Beat egg whites until stiff (pic 2), add in sugar slowly and gradually, and beat until meringue is stiff and shiny (pic3).
3. Put in sifted cocoa powder and cornstarch. Fold.
4. Put in vinegar and chopped chocolate and fold.
5. Mound meringue within drawn circle, smoothing sides and top.
6. Bake in preheated oven. After you've put the meringue in and oven door is closed, immediately turn down the temperature to 150C.
7. Bake for 1 hour 30 minutes. (I followed Nigella's instructions to bake for 1 hour 15 mins, and my pavlova is a bit uncooked. Previously I baked the 4 egg portion with this length of time and it was perfect. So, when the amount is increased to 6 eggs, I guess the same length of time will not be sufficient)
8. When baking time is up. Leave oven door slightly ajar and let pavlova cool in the oven.
9. Remove from oven when it has fully cooled down.

Topping:
350ml dairy whipping cream
3 Tbsp sugar
1 cup strawberry, coarsely chopped
1/2 cup canned mandarin oranges or tangerines, torn smaller
3 kiwi fruits, coarsely chopped

Beat dairy cream until soft peaks, put in sugar and beat until stiff. Mound whipped cream onto pavlova and top with chopped mixed fruits.


All gone within minutes....... what hungry wolves they were.
Hahahahaha!!!!!!
I love those wolves.

Wednesday, March 17, 2010

Fried Rice with Dried Scallops and Kailan Stems


When I was still staying in KL, Mike and I used to frequent this Hong Kong Culture (yes, this is the name of the shop) in Plaza Low Yatt, whenever he goes there for his IT shopping sprees.

I have a few favourites from this shop and one of them is this never seen or heard before, fried rice that is done with dried scallops and egg white that was dotted with broccoli stems. It was so delicious. I didn’t know how did they get the sprinkling of shredded conpoy to be so crispy. Did they steam and shred it? Or were they the remnants of the soup base for their noodles?

I never knew until I saw this at a herbal shop lately.
My eyes lit up when I saw this bottle of golden shreds. Immediately I knew what I want to do with it. Fried rice!!! Hong Kong Culture style!!! And Chinese New Year season, there are lots of Kailan stems around.

I did this during my Form 6 mates reunion at my house during Chinese New Year Day 4.


Fried Rice with Dried Scallops and Kailan Stems

(Serves 6-8)
½ cup dried scallop shreds
6 cups cooled cooked rice
3 stalks of kailan stems (peeled and cut into little cubes, about 2 cups. You may substitute this with broccoli stems)
12 egg whites (1.5 cups)
3 sprigs of spring onion (when finely sliced/chopped, should come to about one cup, white and green parts separated)
1 Tbsp chicken stock powder
1.5 tsp salt

1. Bring a saucepan of water to a boil. Put in kailan cubes and cook for 5 seconds. Strain and keep aside.
2. Heat wok and put in 1/3 cup of oil. Fry dried scallops shreds until golden brown. Dish up scallops shreds leaving behind oil in wok.
3. With the oil in wok, fry egg whites, scrambled until cooked, dish up. Do not overcook.
4. (use the same wok, unwashed, but make sure there are no egg whites left in wok) Put in 2 tbsp oil into wok and put in sliced white parts of spring onion. Saute for 3 seconds and put in rice. Toss rice for about 3-4 minutes until rice is very hot and evenly coated with the oil. Put in cooked kalian cubes. Season with chicken stock powder and salt. Taste and adjust.
5. When rice is nicely seasoned, put in egg whites. Toss until evenly distributed. You may add in fried scallop shreds and green parts of spring onion now or sprinkle them on top of rice later.
6. Serve hot 


My experiment result:
I was there!!! It tasted oh-so similar…. Now I can enjoy my favourite fried rice in Kuala Kangsar.

Now out of the 30 egg whites I had from Prune Layer Cake 2, 4 went to Strawberry Pavlova, 12 here, another 14 to go.... See my next post.


Monday, March 15, 2010

Strawberry Pavlova


I’ve got 30 egg whites left from making a Prunes Layer Cake. And I remembered Nigella making this wonderful crusty dessert called Pavlova. Did some googling and saw that most recipes call for every 2 egg whites, half a cup of sugar be used. Nigella’s recipe seems so huge to me, and this being my virgin Pavlova, I don’t want to risk making a huge one. I followed Joy of Baking’s recipe, with Nigella’s method.

I thought it would be difficult, but hey no.. It’s pretty easy. I succeeded at first attempt. As long as u cool it properly in the oven, do not rush.. rushing is no good to a pavlova… Patience, wait, and you’ll be fine. It will not look perfectly smooth, but with cracks here and there and that does not mean u’ve failed. U failed when u can’t cut the pavlova. Cos the interior isn’t cooked properly. If u can cut, u’ve done it!!

I made a mistake here that I will never do again.. I made a 1 inch tall rim on my raw meringue. Some recipes say to do that rim thing, so that it will hold the cream and fruit. But when my meringue is done, the 1/2 inch wall became 1and 1/2 inches. That’s why u don’t see a mountain of strawberries. My cream and berries weren’t enough to fill up the big crater. Better leave the surface flat so that it’ll form a shallower crater when baked and cooled.

So, what does this taste like??? Sweet!!! Utterly sweet. But, nice.
It has a crunchy crust that melts in ur mouth.
A soft marshmellowy interior that isn’t sticky or gummy. Count to 3, it’s gone.
Accompanied by creamy cream and contrasted by tart strawberries…

It’s really good. Provided each bite of the pavlova be accompanied by some strawberries to offset the sweetness.
Do not try to reduce the sugar, the meringue might not hold. Just add more tart/ tangy/sour fruits to the top and it’ll be fine.


Strawberry Pavlova Recipe
4 egg whites (120gm)
200gm castor sugar
1 Tbsp cornstarch
1 tsp vinegar (I used rice vinegar)
1tsp vanilla

*If using non convection oven, pls raise the temperature by another 20C
1. Preheat oven at 180C. Draw an 7 inch circle (use a baking pan or plate/dish) with a pencil on the wrong side of a non stick baking paper. Place drawn side down on a large baking tray.
2. Beat egg whites until stiff. Beat in sugar by the tablespoons until meringue is stiff. Put in cornstarch and beat for a while (10 seconds, Don’t worry, it won’t deflate). Fold in vinegar and vanilla. (Make sure all the sugar is dissolved )
3. Mound meringue onto drawn circle, smoothing the sides and top.
4. Put into preheated oven and close the door. Immediately turn down the temperature to 130C and bake for 1 hour 15 minutes.
5. When the meringue base is ready, it will look pale and may have some cracks. Leave meringue in oven with door slightly ajar to totally cool down. If u feel that even the baking tray is cool, then it’s really cool.

Topping
200ml whipping cream
1 Tbsp sugar
200gm strawberries or more (hulled and cut into chunks)
(I stabilized my cream by adding in gelatin solution -1/2 tsp melted in 1 Tbsp water)

1. Beat whipping cream until almost stiff and put in sugar. Beat until stiff. Beat in gelatin mixture (if using).
2. Spoon cream onto cooled meringue and top with strawberries.
3. Serve immediately.


*If u want to make the meringue in advance, after baked and cooled, keep in air tight container for up to a week or two. Do not put topping on base if not served within an hour or 2.

Saturday, March 13, 2010

Lean Pork Soup with Green Radish and Carrots


Indications:
Sore Throat, coughing with much phlegm

Functions:
It benefits the spleen and the throat, promotes urination, clears heat, eases mental stress, expels phlegm and stops coughing

Ingredients:
300gm green radish
200gm white radish
150gm carrot
19gm bitter almonds (北杏, 5 钱)
19gm sweet almonds (南杏, 5 钱 )
2 candied dates
250gm lean pork
salt to taste


Method:
1. Rinse pork, cut into smaller pieces and scald it in boiling water for 1 minute.
2. Peel radishes and carrots, cut into chunks. Rinse the almonds and date.
3. Bring 2.5L water to a boil, and put everything in, except salt.
4. Bring to a boil and lower heat to simmer for 2 hours. Season with salt and serve.


Actually this recipe needs more carrots, 300gm of it. But I only have 150gm at home, so I put in white radish, of which I had, to make up for it.

Recipe adapted from Soups for Expelling Dampness and Heat, by Chiu Sang.

Thursday, March 11, 2010

Prune Layer Cake 2


Actually this was an order for Chinese New Year. This lady wanted a low cholesterol full egg yolk layered cake. Usually if I made this for personal consumption, I'll only do whole eggs, but since it's an order, ok, let's go for 30 egg yolks.

Recipe is similiar to the previous post, Haw flakes layer cake, but, I replaced the 10 whole eggs with 30 egg yolks.


450gm butter
140gm sugar
30 egg yolks from large eggs
510gm condensed milk
240gm cake flour
1 cannister Prunes, 340gm. Snip prunes into half. Press to flatten on a plate.

Method:
1. Preheat oven on grill setting. (My oven has either 230C or 250C setting, so I used 230C)
2. Use a 9x9 inch square pan. Line bottom of pan. Heat up pan for step 8 (I do this over the hot water I prepared for the water bath later).
3. Beat sugar and butter until light and fluffy.
4. Add in eggs, one by one. Beating well after each addition.
5. Mix in condensed milk
6. Sift flour and fold into batter.
7. Separate batter into 10 portions.
8. Spread a portion of batter evenly onto hot pan.
9. Tilt pan left and right to level batter. Grill for 7 minutes or until golden.
10. Remove from oven and press cake layer to remove excess air. Spread another portion of batter over the cooked layer, tilt pan to level batter and arrange flattened prunes onto batter. Grill for 7 minutes or until golden.
11. Alternate step 9 and 10 until batter is finished.

****
Pan needs to be heated up at step 2 for even distribution of batter. You can either heat up in the preheating oven or over a pot of hot water.

Switch off oven fan when u do this cake, if not, the bottom will burn at the end of the baking. If the fan cannot be turned off, like my oven, even on grill mode, bake this cake in a shallow water bath to prevent the base from over browning…my baking pan is 9X9 and my water bath pan is 10X10. Too big a water bath pan will leave u a very moist cake, and a longer browning time. But even if it gets too moist later, u can dry it up in the microwave on low for 10 minutes and then wrap it up again for even distribution of moisture from within.


What did I do with the leftover egg whites???? Few recipes coming up :)

Tuesday, March 9, 2010

Haw Flakes Layered Cake


Sarawak Style Layered Cakes... Long time never do this. I'm stingy to pay for the electricity the grilling uses.

I did this for Chinese New Year, I didn't bake any cookies. This is easier, at least I don't need to sit there doing nothing but shaping and filling cookies. For this I just put it in the oven, wait for the buzzer and do another layer. In between baking the layers, I can online, do this blog and fold my laundry, I have more liberty in short. More time for other things.

This time I used this type of Hawflakes, which I find to be not that good. The previous type that I used is the small pink packaging type. That one gives better flavour. To me this one in the picture is a bit too sweet and less tang.


I also changed the recipe this time. Did not use strawberry jam. Didn't use crushed Marie biscuits, but just cake flour.


The recipe this time is,

450gm butter
140gm sugar
10 large eggs
510gm condensed milk
240gm cake flour
few drops of red food colouring

Method:
1. Preheat oven on grill setting. (My oven has either 230C or 250C setting, so I used 230C)
2. Use a 9x9 inch square pan. Line bottom of pan. Warm up pan for step 8 (I do this over the hot water I prepared for the water bath later).
3. Beat sugar and butter until light and fluffy.
4. Add in eggs, one by one. Beating well after each addition.
5. Mix in condensed milk
6. Sift flour and fold into batter.
7. Divide batter into 2 parts. Colour one part with red food colouring, leave the other plain.
8. Spread a ladle of batter(red) evenly onto hot pan.
9. Tilt pan left and right to level batter. Grill for 7 minutes or until golden.
10. Remove from oven and press cake layer to remove excess air. Spread another ladle of batter (plain) over the cooked layer, tilt pan to level batter and arrange haw flakes onto batter. Grill for 7 minutes or until golden.
11. Alternate step 9 and 10 until batter is finished.

****
Pan needs to be warmed up at step 2 for even distribution of batter. You can either warm it up in the preheating oven or over a pot of hot water.

Switch off oven fan when u do this cake, if not, the bottom will burn at the end of the baking. If the fan cannot be turned off, like my oven, even on grill mode, bake this cake in a shallow water bath to prevent the base from over browning…my baking pan is 9X9 and my water bath pan is 10X10. Too big a water bath pan will leave u a very moist cake, and a longer browning time. But even if it gets too moist later, u can dry it up in the microwave on low for 10 minutes and then wrap it up again for even distribution of moisture from within.

Well, in order to make sure all layers are equal and that no either type of batter are in excess, I separate the batter into portions, kept in bowls. So that I will have equal layers, and no leftovers.

To serve,
Cut off dry ends, divide cake into 4 long pieces and slice each piece less than 1cm thick. This cake is not meant to be chomped on, but eaten slowly over tea. Taste better as it ages. I kept this at room temperature for over a week, and it still looks good. If kept in the fridge, it can keep for months.

Oh yes,
Nicole and Aunt Yee Wah, how was the pandan kaya layer cake??

Printfriendly

Related Posts Plugin for WordPress, Blogger...